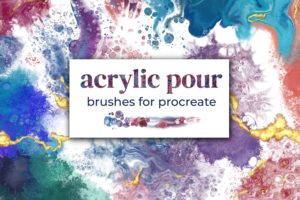
Today we are going to create beach themed artwork with digital fluid pour methods, using Procreate on the iPad. Inspired by the rainy UK weather, I wanted to create something with cheerful sunshine and beach vibes. I will be using my Acrylic Pour brush set for Procreate, though you are very welcome to adapt the concept for any other brushes you want to try.
Having trouble seeing the video? You can also watch it on YouTube.
Step 1: Set Up the Canvas
First, open a new canvas in Procreate by tapping on the plus symbol. For this tutorial, we’ll be using a canvas size of 10×8 inches at 300 DPI.
Step 2: Choose Your Colors
Select the colors you want to use for your artwork. For this tutorial, I’m using the following colors:
- Water: #044081
- Sand: #F1A092
- Off-White: #EAE5E7
- Pure White
Step 3: Create the Water and Sand
- Choose the blue color for the water and select the “fluid pour number 2” brush from the acrylic pour brush set.
- Fill the corner of the canvas with the blue brush, creating a wave pattern. Adjust the size and position as needed.
- Switch to the pink color for the sand and use the same brush to create a line of pink at the bottom of the canvas, leaving a small space between the two colors for the sea foam.
Step 4: Add the Sea Foam
- Switch to the off-white color and brush it through the middle of the blue and pink colors, creating a sea foam effect. Repeat a few times to make the effect more solid.
Step 5: Create Waves and Movement
- Change brushes to “swipe with cells number 9” and drag the white color upwards to create wave-like patterns. Do this on both the sandy and watery areas.
- Follow the natural flow of the colors, adding movement and blending where needed.
Step 6: Add Cells and Texture
- Switch to the smudge tool and select the “Dynamic cells number 3” brush.
- Create cells by dragging the colors from the blue or white areas to create a sea spray effect.
Step 7: Add Sea Spray with Blowtorch Brush
- Switch to the smudge tool again and select the “blowtorch” brush.
- Use the brush to create small, uniform cells and add more texture to the existing cells, creating a more dense and oceany look.
Step 8: Add Pure White Highlights
- Switch back to the brush tool and select the pure white color (#FFFFFF).
- Choose the “blowtorch” brush again and carefully add white highlights to the sea spray for more definition.
And there you have it – a simple digital acrylic pour with ocean vibes. You can further experiment with this technique by adding rocks, more colors, or different brushes. I hope this tutorial inspired you to create something beautiful and beachy. Thank you for following along, and happy creating!
Brushes
Brushes: Acrylic Pour
