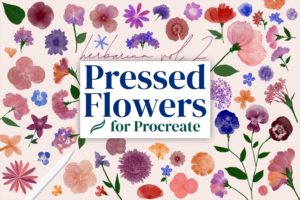
I’ve noticed a decor trend where people will hang dried flowers upside down, attached end to end and hanging in lines, so that they are looking kind of like a curtain. I really like how this looks so I wanted to try out the concept with my new pressed flower brushes, and at the same time use the opportunity to demo how to create more kinds of flowers with the brush set.
Click below to watch the tutorial!
Key Info:
- New canvas, 8×10″ at 300 DPI
- Brush set: Pressed Flowers
Steps:
1. Gear icon > Canvas > Enable Drawing Guide (this will help us draw the flowers in a straight line).
2. Tap “Edit Drawing Guide” an adjust the grid size
3. Using the brushes in the Build a Flower Dynamic section, create multiple blooms all facing upward, along the lines.
4. With the dynamic flower brushes, draw a small semicircle for a side flower, and a full circle for a full flower.
5. Moving to the stamps section of the Build a Flower folder, stamp some blooms on as well. The direction your pen is pointing will determine which part of the flower is “up.”
6. Use the Sepal brushes from the Leaves & Stems section of the folder, to add a green base to some of the flowers, wherever you feel it needs a little something.
7. Add stems (using the stem brushes) to each blossom, connecting it to the one below it. Feel free to let the stems be a bit wonky/imperfect.
8. Add leaves to the stems using the leaf brushes, applying pressure and then a flick at the end to create a taper.
9. Optionally, add more leaves with a different leaf brush and color.
10. Turn the whole composition upside down using two fingers to twist it, so that the flowers are now coming down from the top.
I would love to see what you come up with! You’re very welcome to tag me on Instagram @alainajensen, use #alainajensenbrushes or share your work in our free facebook group.
If you have any questions please click here to contact me. I’m always happy to help!
You can click below for more information about the brushes.

