Today, we are adding pressed flowers as embellishments to a letter in the Procreate app. This is not a plant that would grow anywhere in nature, but instead we are building it up as a collage – I like to imagine that I have a box of pressed flowers next to me and I’m choosing elements out of that box and then gluing them on to this page to create a composition around the letter.
Click below to watch the tutorial!
Key Info:
- New Canvas 8×10″ at 300 DPI
- Gear icon – Add – Add Text
- Add a large letter with font: DM Serif Display
- New Layer, move it above the letter layer
- Flower Stamps used: Forget me not 1 & 2, Pansy 5, 7, 9, 11 & 10, Primrose 1, Poppy 3 & 4
- Dynamic Flower brushes used: Petals 4, Sweet Pea 2
- Leaves & Stems brushes used: Sepal 1 & Stem 1
- Erase parts of stem with Eraser Tool – Airbrushing – Medium Hard Brush
- Further Leaves & Stems brushes: Leaf 1, Stem 2, Leaf 5
We start by adding a large letter L using the DM serif display font from the link above. Then we add a new layer above that and rename it “flowers” so that we can add our flowers there.
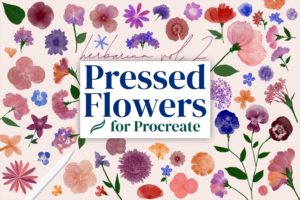
So we are using my build a flower brush set which comes with the Pressed Flowers brush set. We’re going to start without the stems. We choose various pressed flower stamps in various colors and sizes and add them around the letter. We can tilt the pen to control which direction the flower is pointing when it comes out, so that it comes out of the top of the pen, just like a flower sprouting out of the pen.
After using the stamps, we add some dynamic flower heads as well, but choosing some brushes from the dynamic section, and creating some circles and some half circles with these brushes, again in various colors and sizes.
Now it’s time to add the greenery. We start by adding a Sepal (green base) with the Sepal brushes, so some of the flowers and particularly the side flowers which were created with half circles. We don’t do it on every flower but we just kind of scan the whole thing to see where it makes the most sense, as this is just sort of the connecting bit between the stem and the flower. So that it looks more realistic than just having a stem connecting there.
Going back to the brushes, we choose a stem brush in the same color, and we start building up stems going to each flower. This is not going to be realistic in that all of these flowers would obviously not be growing out of the same plant. So I’m not trying to make it look realistic, but I’m trying to make it look sort of like I had a collage of different pressed flowers, and put them all together to decorate this letter. At this point, all of the stems are going to be in front of the letter L and at a later point we will erase some of that so that it looks like it’s intertwined and with the L.
Next up, we select the eraser tool, and going to the airbrushing folder, which is a default folder, and the medium hard brush from that folder, in order to take some of these stems away, so that it looks like the plant is coming up behind the L. We are not going to do this everywhere, but I’m just in a couple of places.
Next we add leaves using the leaf brushes. We use a small flicking motion that kind of loses pressure at the top, and that’s how we get this taper.
So going back to the brushes, we are choosing another stem brush and leaf brush in more of a greenish blue color, and adding more curlies and leaves in that color for variety.
So that concludes our little tutorial, and you could use this for a lot of different contexts. You could use different fonts and words, you could use a name, you could create a poster or you could make an invitation, so hopefully there are a lot of ways to use this idea. Thank you so much for watching and I hope you enjoyed it and I will see you next time.
I would love to see what you come up with! You’re very welcome to tag me on Instagram @alainajensen, use #alainajensenbrushes or share your work in our free facebook group.
If you have any questions please click here to contact me. I’m always happy to help!
You can click below for more information about the brushes.

