

In today’s tutorial, I want to take you a step further with my latest brush set, the Gemstone Creator. I’m going to show you how to breathe more life and color into the textured polished stones in the set and how to add some creative embellishments to make them pop.
Having trouble viewing the video? You can also watch it on YouTube.
Getting Started:
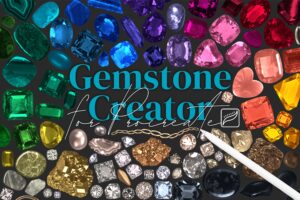
First off, create a new project on Procreate. For this tutorial, we’ll work with a 10 by 8 inches landscape canvas. Open the Gemstone Creator brush set and you’ll see different sections like cut gemstones, natural stones, polished stones, diamonds, and embellishments. Our focus for this tutorial is on the ‘polished stones’ section, specifically on the veiny, flecked, and marbled stones. Let’s select the flecked polished stone number four.
Adding the Stone:
Pick a dark color, say a deep gray, and create a fairly large stone on your canvas. Before tapping to add the stamp, rotate your pen to position the stone on the canvas in the way you want, and tap to add the stamp.
Coloring the Stone:
Now comes the fun part – adding color! Tap the stone layer, then select Alpha lock. This allows us to color directly on the layer. This is a destructive process, so if you wish to keep a copy of the original, just duplicate the layer before you start coloring. Now select the ‘add color’ brush from the embellishments section, and let’s start coloring.
Adding the Flecks:
Using the ‘add color’ brush from the Gemstone Creator set, start filling in the flecks on the stone with different colors. For this tutorial, I chose to use the Gemstone Creator Jewel Tones palette that comes with the brush set. This palette has some really bright colors that pop out beautifully on the stones. Color the flecks in different shades of green, blue, pink, purple, and red (or any colors that you want). Don’t worry about being perfect – just have fun with it.
Embellishing the Stone:
Once you’re satisfied with the coloring, it’s time to add some embellishments. Create another layer above the stone, set it as a clipping mask, and name it ‘flecks’. Use the ‘multi-colored flecks’ brush to add some gold flecks on top of the colored ones. You can also experiment with the size and pressure of the brush to create a variety of effects.
Adding the Final Touches:
Finally, add one more layer on top, set it as a clipping mask, and name it ‘gold’. Using the molten metal number two brush, add some more gold flakes to the stone. If you want, you can also use this brush to add veins or lines of gold to create an encased look.
Conclusion:
And that’s it! You’ve now created a beautifully colored and embellished stone using the Gemstone Creator brush set. This technique isn’t just limited to this set – you can use it on any stamp or image in Procreate. Have fun with it, experiment, and create some stunning art pieces.
I hope you found this tutorial informative and helpful. If you have any questions or need further clarifications, don’t hesitate to reach out. Don’t forget to check out the Gemstone Creator brush set and other products available in my shop. Happy creating!
Brushes: Gemstone Creator