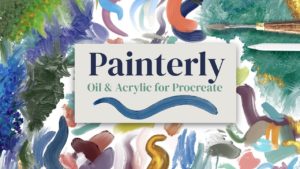
I’ve been playing around with the idea of digitally painting a landscape on a wood slice image, and I thought it would be fun to share the process with you. We’ll be using Procreate as usual, with my Painterly brush set (or any other oil or acrylic type brushes that you would like to use). Let’s dive in and see what unfolds.
Can’t see the video? You can also watch it on YouTube.
Step 1: Importing the Wood Slice Image
Open Procreate, then head over to Unsplash and search for ‘wood slice’. You can use any image you like, but for this tutorial, we’re using an image from Mockup Graphics (link will be provided). Simply drag the image into Procreate to import it.
Once imported, you’ll see the wood slice image on a new layer. Let’s keep things organized and rename this layer to ‘Wood Slice’.
Step 2: Preparing the Workspace
Next, create a new layer above the wood slice layer and name it ‘Paint 1’. Since we only want to paint on top of the wood slice and not outside it, we’re going to create a mask.
Go back to the wood slice layer, choose the selection tool set to ‘Automatic’, and tap the background. Adjust the selection so only the wood slice is selected, then invert the selection. With the wood slice still selected, go to the ‘Paint 1’ layer and tap ‘Mask’. This will ensure your painting stays within the bounds of the wood slice.
Step 3: Blocking in Colors
Now, let’s start painting. Using the ‘Dry Oil Brush’ from the Painterly set, begin to lay down some colors. For this tutorial, we’re using a palette called ‘Monet Twilight’ which is included in the Painterly brush set. Start by filling out the background with a medium blue, adding lighter streaks and variations with white and lighter blues. Remember, we’re just blocking in colors at this stage, so it doesn’t need to be perfect.
Step 4: Adding Details
Switch to the ‘Soft Streaky Palette Knife’ brush to add blocky strokes for the sky. Experiment with different blues and even a bit of gold to simulate the sunrise. Then, using the ‘Soft Pointed Palette Knife’, paint in some tree shapes along the horizon. Feel free to play around with the colors, brush sizes, and pressure to achieve the texture you want.
Step 5: Refining the Painting
To create more texture, switch to the ‘Super Dry’ brush to roughen up the bottom of the trees and the edge of the lake. Go back to the palette knife brushes to add streaks of color across the lake and bursts of color in the sky.
If your painting feels a bit flat, add more dimension by adding more white and lighter colors. Don’t be afraid to paint over areas you’re not happy with.
Step 6: Final Touches
To finish off, consider adding more elements like another big tree. Use the ‘Soft Palette Knife’ to create big strokes, adding more depth and interest.
And there you have it! Your very own digital painting on a wood slice image. Don’t forget to share your work on Instagram or in our Facebook group. We’d love to see your take on this technique.
Remember, the key to any artistic journey is to have fun and keep experimenting.
Supplies
Brushes: Painterly

